
Appearance
Scene List
Use the Lite Scene List to save camera views, environment settings, and effects in SketchUp, Rhino, or Revit. Switch between scenes to compare views or lighting, or restore a saved look before rendering.
What a scene records
| Category | Content |
|---|---|
| View | Camera position and direction |
| Environment | All environment settings, including Custom Sun and HDRI |
| Effects | All effect parameters; see Effects for the available controls. |
| Exposure | Exposure value and auto-exposure state |
| Output settings | Image quality, format, aspect ratio, and channels |
Basic operations
- Click the Scene List button in the lower-left corner of the Lite window. Click Add Scene. The new scene uses the current view. Its thumbnail appears in the list.
- To update an existing scene, select it first, make your changes, then click its Update Scene icon.
- Save the model file after adding or updating a scene. Select the scene again to verify the saved view, environment, and effects.
You can also rename or delete scenes.
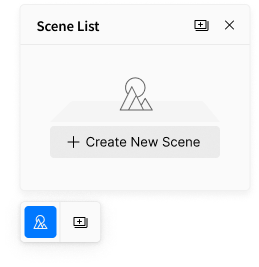
If you haven't created a scene, Lite uses one set of environment and effects settings for the entire model. Lite saves these settings with the model file.
Copy and paste environment and effect settings
Right-click the source scene and choose Copy Parameters. Right-click another scene in the same project and choose Paste Parameters. Lite replaces only the destination scene's environment and effects settings.
The camera view, output settings (image quality, format, aspect ratio, and channels), and scene name stay the same. Switching projects clears the copied settings.
Syncing with SketchUp scenes
By default, Lite syncs scenes with SketchUp. When you create, update, rename, or delete a scene in either app, the change appears in the other.
Syncing with Rhino named views
Lite scenes correspond to Rhino named views. Creating or selecting one updates the corresponding scene or named view in the other app. Sync Viewport controls continuous camera following; see Camera controls · Rhino. Rhino stores the camera in its named view. When you create or update a scene in Lite, Lite also saves its environment and effects. Rhino Snapshots do not sync to Lite.
Revit scene list and sync modes
Choose a sync mode in the Lite settings on the Revit toolbar. Your choice takes effect the next time you switch views.
- Viewport sync only (default): Syncs the camera view without reloading model content. Use this mode to switch viewpoints quickly.
- Full sync: Syncs the camera view, model content, and visibility. Use this mode when views contain different elements or visibility settings. Allow time for the view to load.
Creating, deleting, or renaming a scene in Lite updates the corresponding Revit 3D view, and vice versa. Follow Revit's naming rules for 3D views. Renaming a view keeps its saved environment and effects. Lite loads each view's saved settings when you switch views.
With Sync Viewport on, Lite follows camera changes in the active Revit 3D view in real time. To update a saved scene, select it before changing the camera, environment, or effects. When finished, click its Update Scene icon, then save the Revit project file.
Sync to D5 Render
Model sync alone doesn't send a scene's environment or effects. To transfer these settings, use a version of D5 Render that can receive them. Versions that use the older scene interface receive only the camera. SketchUp and Rhino support this workflow. In Revit, only perspective 3D views from the Revit project can be sent.
- Save the view, environment, and effects in the Lite Scene List. For a new scene, click Add Scene. For an existing scene, select it before making changes, then click its Update Scene icon.
- Save the project file in your modeling software, then close Lite.
- Connect to D5 Render from the D5 toolbar in your modeling software and wait for the model to sync.
- Send the scenes from your modeling software: in SketchUp, click Send Scenes; in Rhino, run
D5LiveSyncSendScenes; in Revit, click Sync Scene to send the supported perspective 3D views. - Open the corresponding scene in D5 Render's scene list and check the camera view, environment, and effects. Scenes without their own recorded environment and effects use D5 Render's global settings.