
Appearance
Effects
Set the overall brightness with Exposure, then adjust highlights, shadows, and color.
Open the effects panel
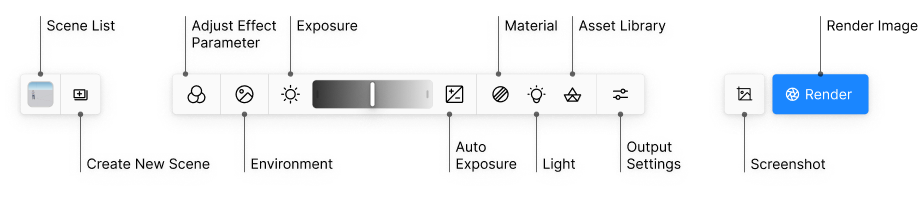
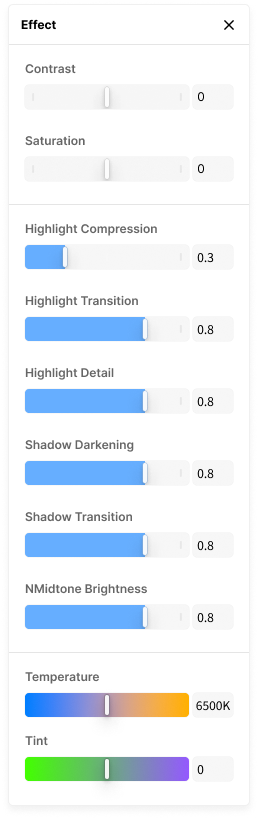
Open Effect from the Lite viewport toolbar to adjust tone and color. Drag a slider or enter a value to see the result in the viewport.
Exposure
Adjust exposure or turn on Auto Exposure from the viewport toolbar.
| Parameter | Purpose |
|---|---|
| Exposure | Adjust overall image brightness. |
| Auto Exposure | When on, Lite adjusts brightness automatically based on the current view. |
If the image is too dark or too bright overall, adjust Exposure first; if brightness varies a lot between views, try turning on Auto Exposure.
Tone and color
Color
| Parameter | Purpose |
|---|---|
| Contrast | Increase or decrease the difference between light and dark areas. |
| Temperature | Make the image look warmer or cooler. |
| Tint | Adjust the image's color cast. |
| Saturation | Make colors more or less vivid. |
SketchUp
| Parameter | Purpose |
|---|---|
| Highlight Compression Strength | Adjust how strongly bright areas are compressed. |
| Highlight Transition Range | Adjust the transition between highlight compression and other brightness levels. |
| Highlight Detail | Adjust detail in bright areas. |
| Shadow Darkening Strength | Adjust how strongly dark areas are darkened. |
| Shadow Transition Range | Adjust the transition between shadow adjustments and other brightness levels. |
| Midtone Brightness | Adjust brightness in the midtones. |
Rhino / Revit
| Parameter | Purpose |
|---|---|
| Highlight | Control the bright areas. |
| Shadow | Control the dark areas. |
| Slope | Adjust how sharply the tone mapping transitions between light and dark areas. |
Save and sync effects
To keep the effects for the current view:
- Open the Scene List at the lower-left corner of the Lite window. To save the current look as a new scene, click Add Scene. To update an existing scene, select it before adjusting the effects, then click its Update Scene icon.
- Save the project file in the modeling software.
- Select the scene again to verify the saved effects. To keep further changes, click the scene's Update Scene icon and save the project file again.
To use the recorded effects in D5 Render, follow the scene sync steps. After syncing, select the corresponding scene in D5 Render and check its effects.
Syncing the model alone does not send scene environment and effects. Revit can sync only perspective 3D views from the project. Use a D5 Render version that supports syncing scene environment and effects.